PhotonVision
Installing PhotonVision
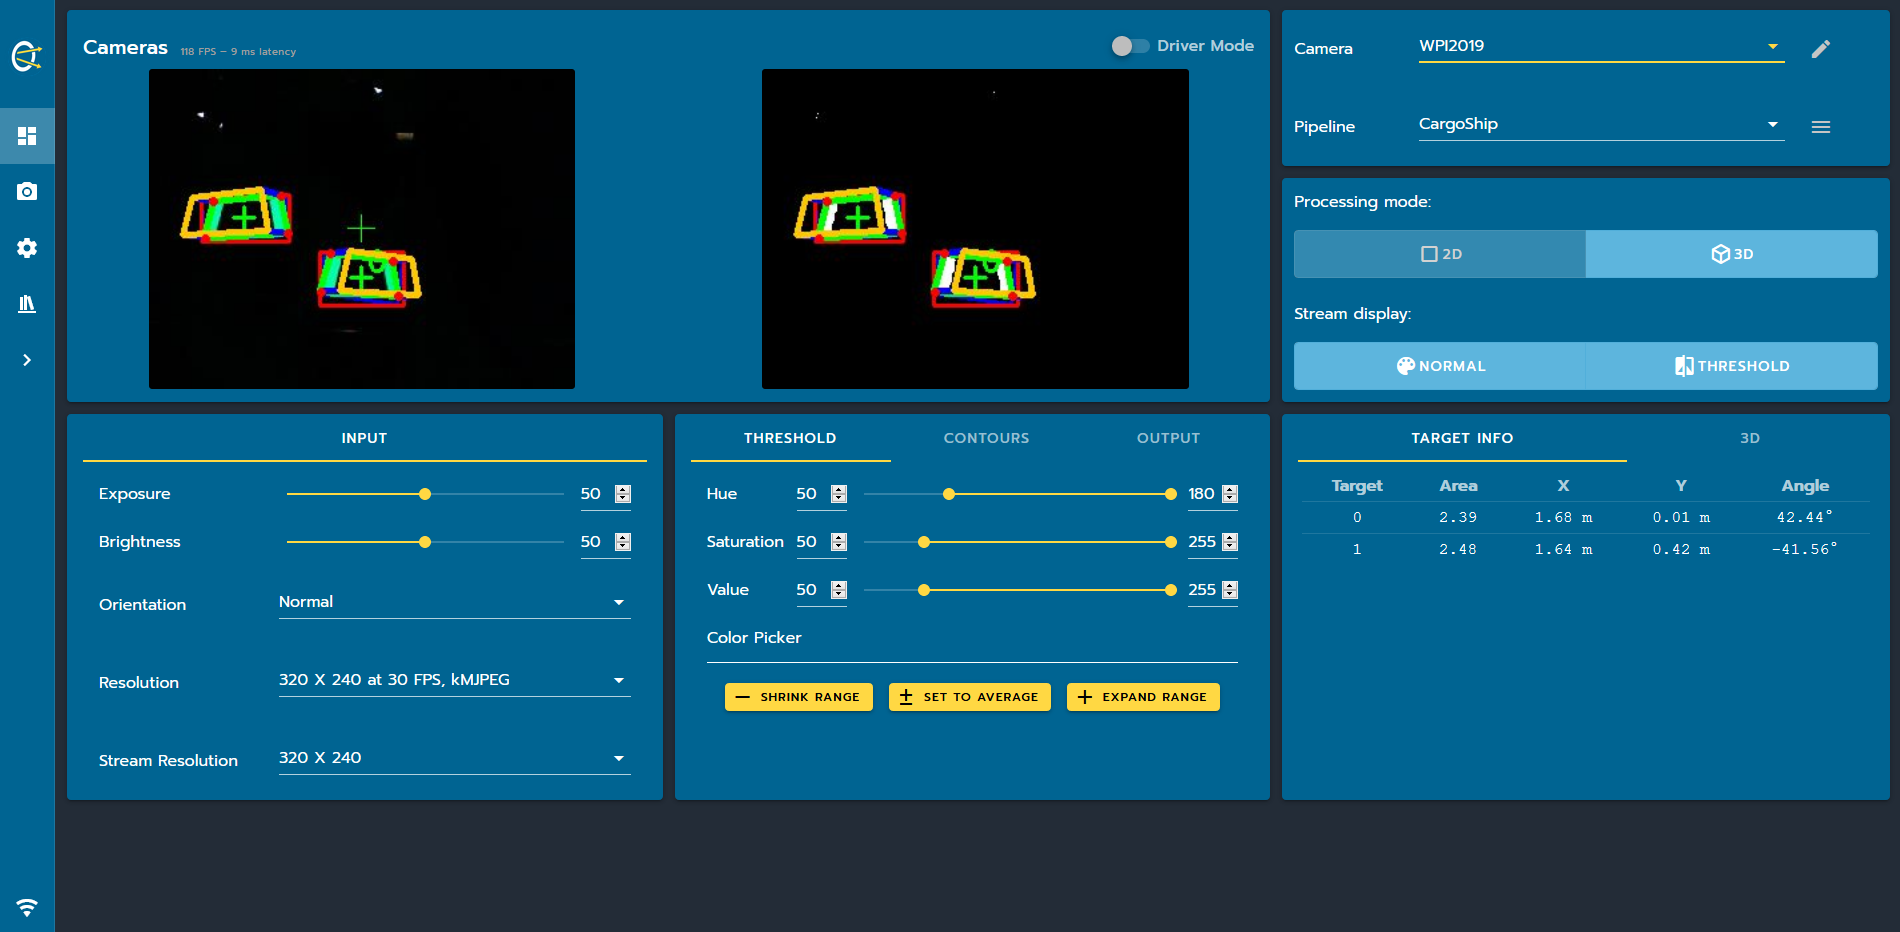
[PhotonVision] PhotonVision
Calibrating the LimeLight for AprilTags
After downloading the software, connect the LimeLight to the robot and turn it on. Run an IP scan with AngryIPScanner to locate the LimeLight across the network. It should be on 10.te.am.XX (So, 10.25.30.XX for us), look for it once the IP scan has complete. (It will be named something like photonvision.local).
Put the IP into your search bar, and see if the photonvision dashboard pops up.
It may not identify AprilTags (in 3D mode) quite yet as you will need to calibrate PhotonVision to do so. Navigate to the Cameras tab on PhotonVision and scroll to where it says "Download Target". Print it out with 100% normal scale (It should look like a chess board). Use Start Calibration and observe as the camera draws colored lines on the sheet. It has to be very flat for good identification, so use a flat board when calibrating. Follow the instructions that it gives you and use the Take Snapshot button to take multiple pictures for calibration. Use the Save button when complete. It should now be able to track AprilTags in 3D!